Creating user roles
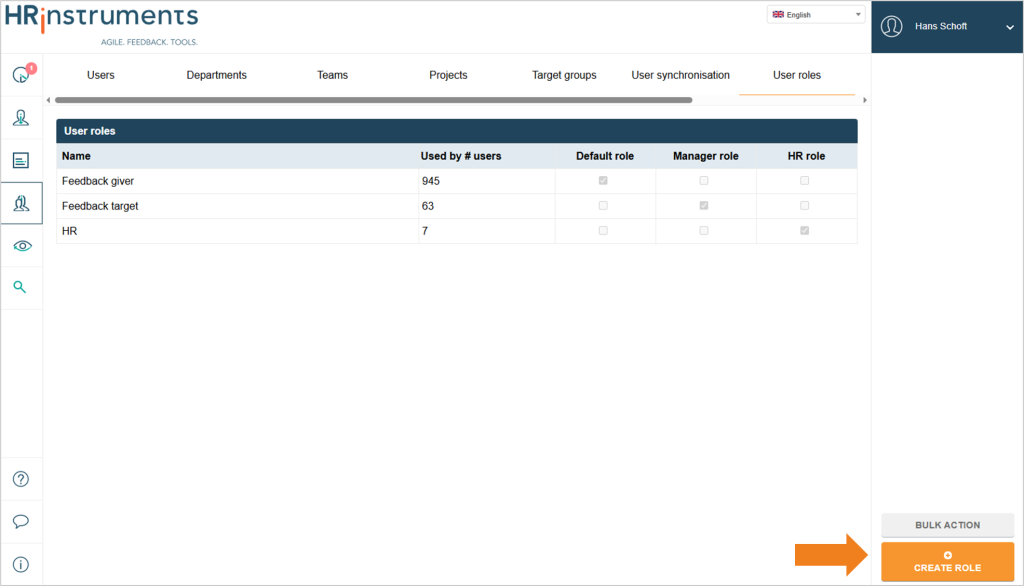
Navigation to the “User roles” tab
You can navigate to the “User roles” tab via the “Users” menu item.

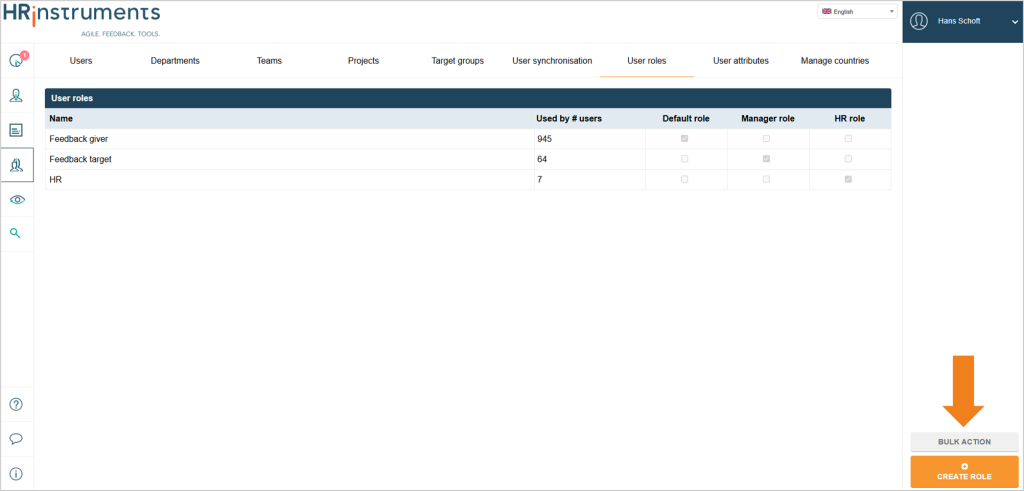
All existing user roles are displayed here.
Creating a new user role
A new user role can be created using the “Create role” button at the bottom right.
A pop-up opens in which the properties of the role can be defined.
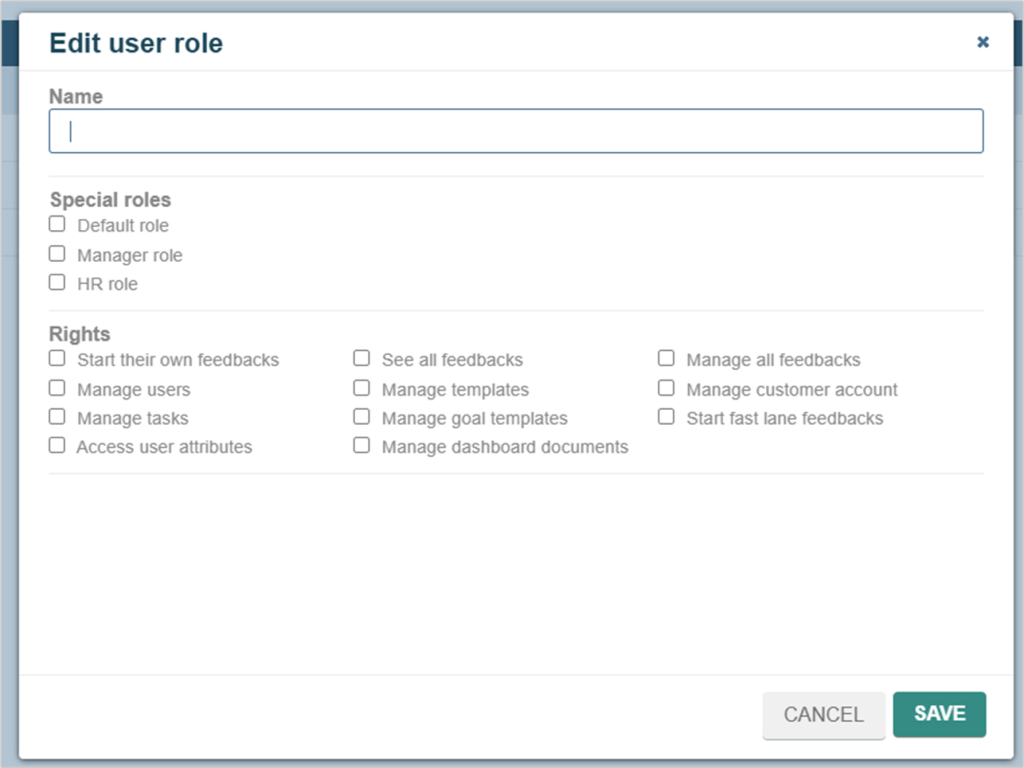
The name for the role is assigned in the upper text field.
Next, the role can be marked as a “special role”:
Default role
If a role is marked as the “default role”, it is automatically assigned to every user. Even if users are subsequently created or imported, they are automatically assigned this role.
Conversely, a role that is unchecked as a “standard role” is removed from all users.
Manager role
If a role is marked as a “manager role”, this role is automatically assigned to every manager. This applies to managers of both departments and teams. Even if users are subsequently appointed as managers, they are automatically assigned this role.
Conversely, a role for which the “Manager role” checkbox is removed is removed from all managers.
Users with a “manager role” always implicitly have the following rights:
- Managing feedback cycles for their department
- Managing development tasks and goals for their employees
HR role
In contrast to the other two special roles, an “HR role” is never granted automatically. In addition, these roles can only be granted to users who also have an “HR” role themselves.
This role is granted to selected people in the HR department as part of the HRinstruments onboarding process.
Users with an “HR role” always implicitly have the following authorizations:
- Access to all results of all performance feedbacks
- Access to all goals and development tasks
Finally, rights can be assigned to the role. All users who are assigned this role receive these rights. A list of all rights and their meaning can be found here.
The settings can then be saved at the bottom right.
Managing and assigning user roles
The name of a role, the number of assigned users and any special role markings can be viewed in the role overview.
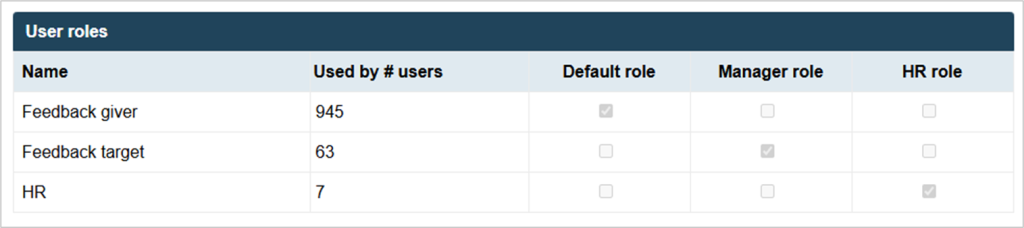
Roles can be assigned to users both automatically (by marking them as special roles) and manually. Using the “Bulk action” button at the bottom right, a role can be assigned or withdrawn from several users at once.
In the “Bulk action” pop-up, a role can be assigned to or removed from several users.
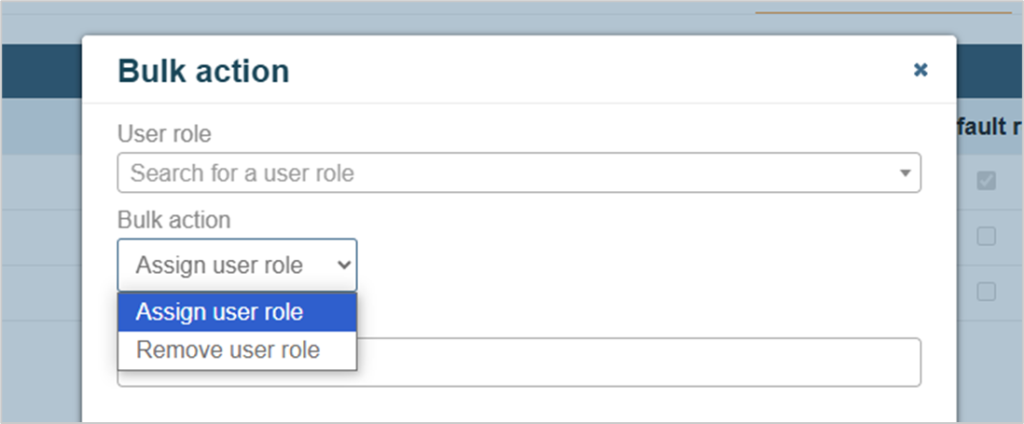
Users for whom the action is to be carried out can be selected in the “Users” input field. In addition, a list of email addresses from the clipboard can be inserted in order to transfer a large number of users, e.g. from Excel.
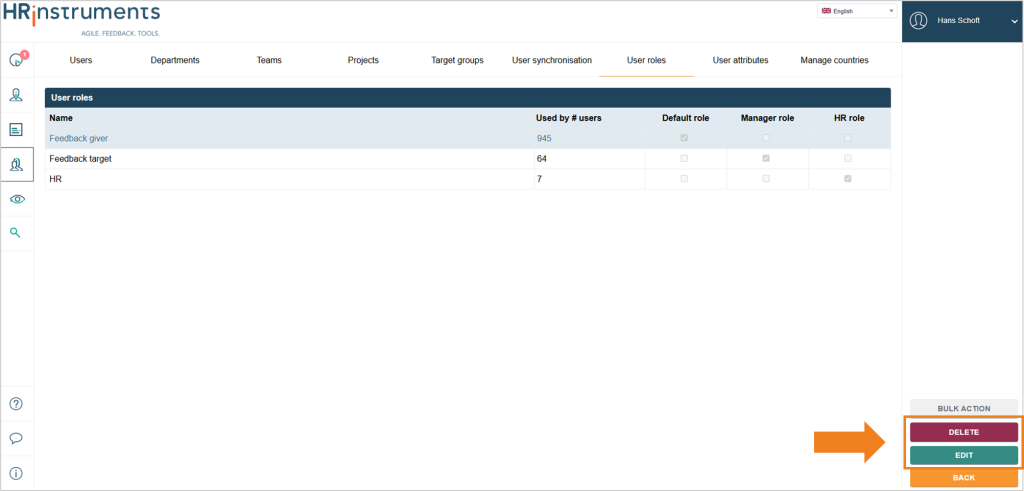
Once selected in the list, a role can also be edited or deleted using these buttons:
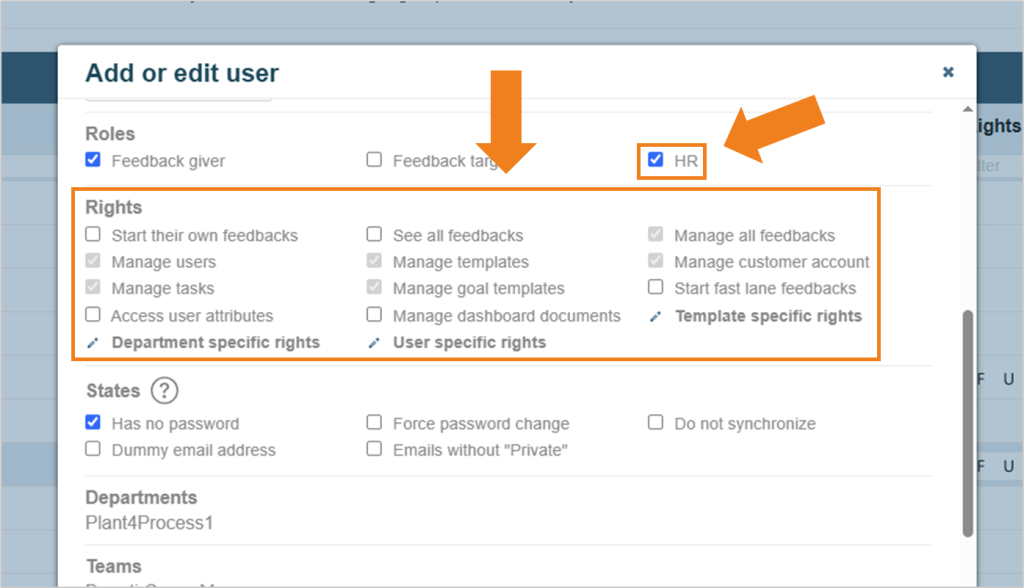
In the user administration, user roles can be granted and revoked at the point shown:
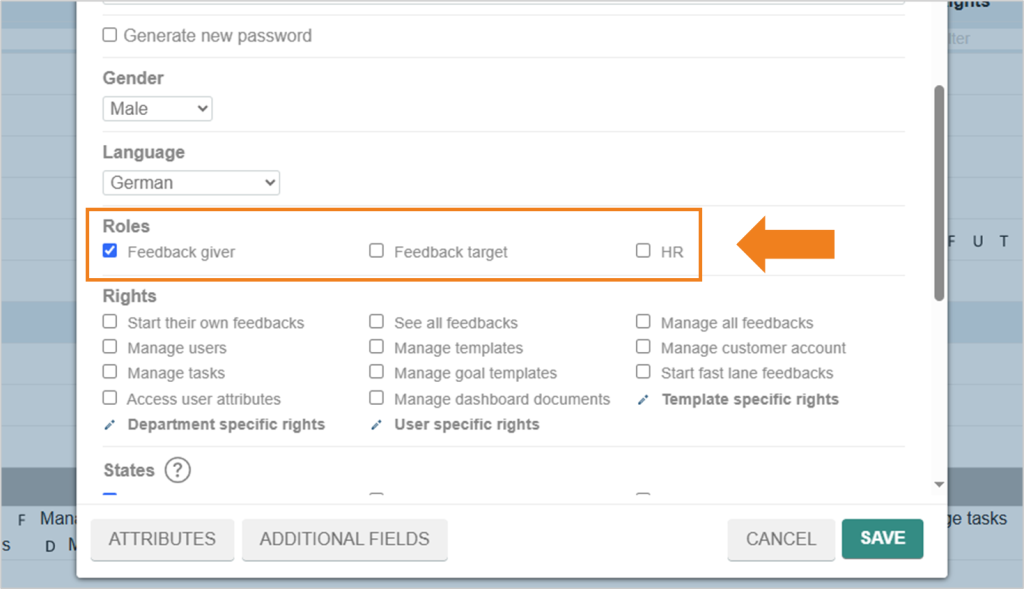
If you select a role in a user profile, the rights associated with the role are automatically granted after saving. As long as a user is granted rights via a role, these rights cannot be revoked here.
In this example, this is demonstrated for the “HR” role: